 |
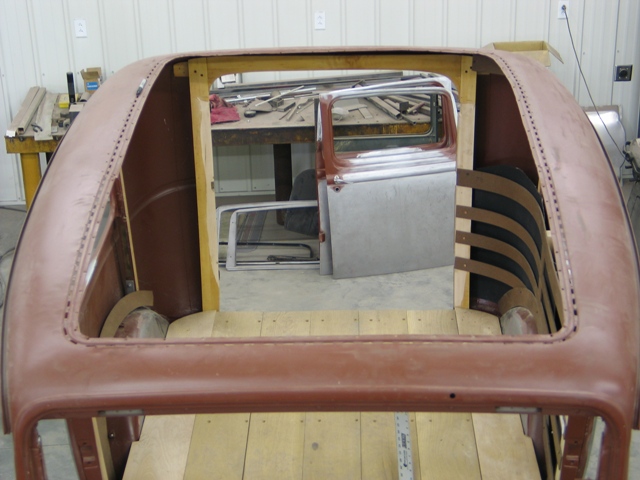
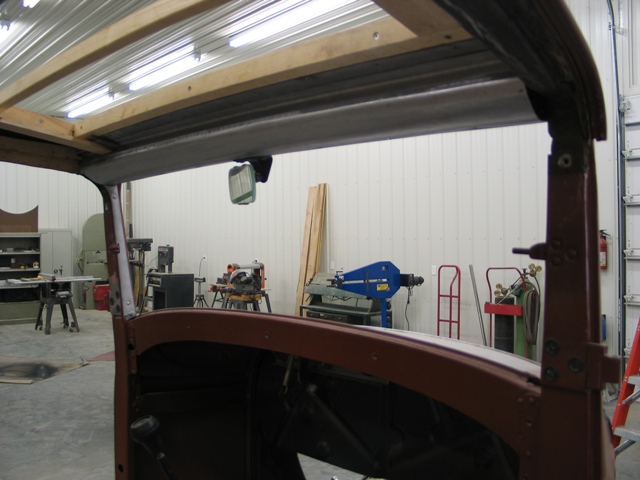
Here's what we
started with. The roof will have a steel removable insert (that will be
covered in material). We're going to install new roof wood, but first we
need to make a new platform for the insert to sit on. |
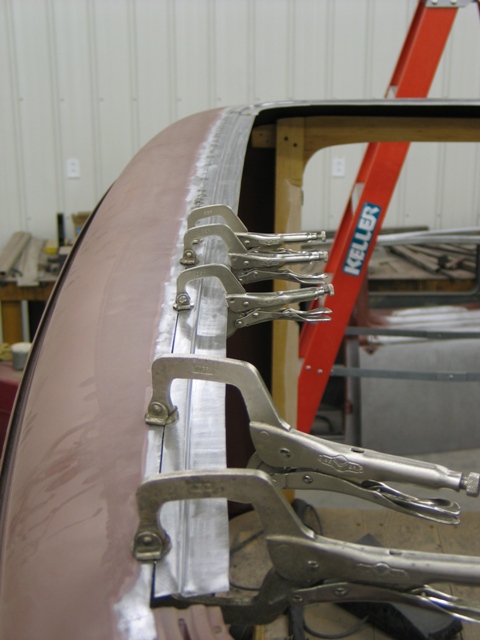 |
The old section is
removed and a new one that has the correct depth is made and fitted.
It's carefully welded in and metal worked real nice.
|
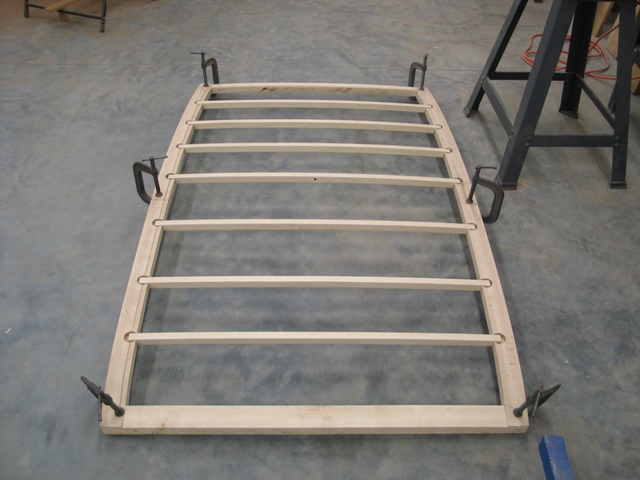 |
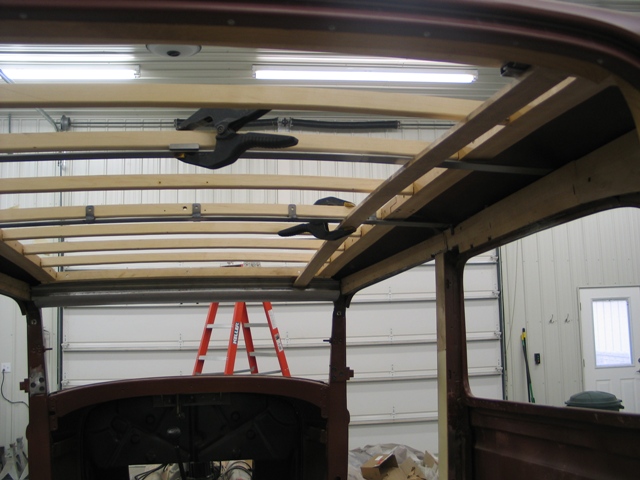
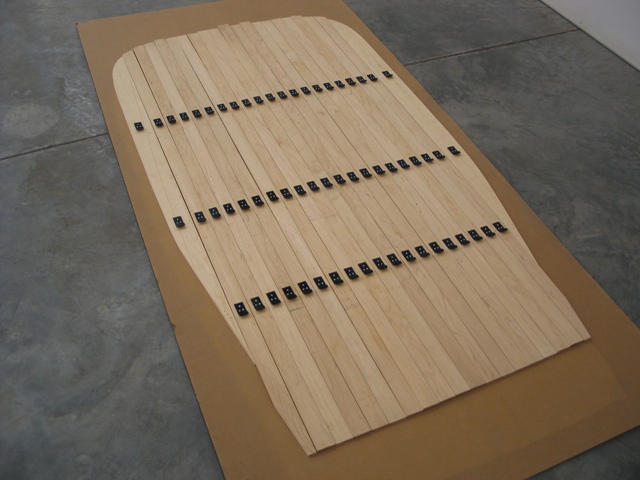
The new wood is mocked up.
|
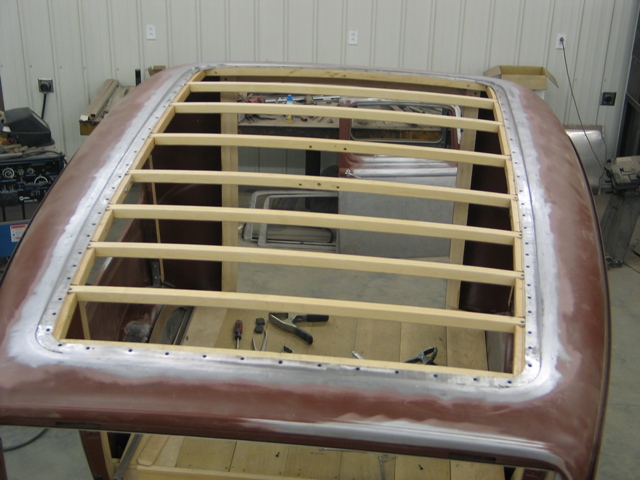 |
The new wood is fitted and installed. |
 |
We handmade a new header piece that will support the new wood slats. It will later have pins added (2 per slat) for locating the slats.
|
 |
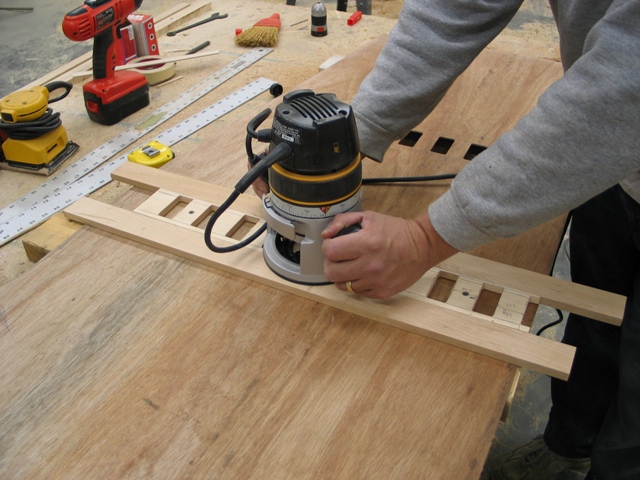
We wanted the slats to have no visible fasteners, so we made support brackets and brackets that mount to the slats and attach to the support brackets. Here we are test fitting one slat.
|
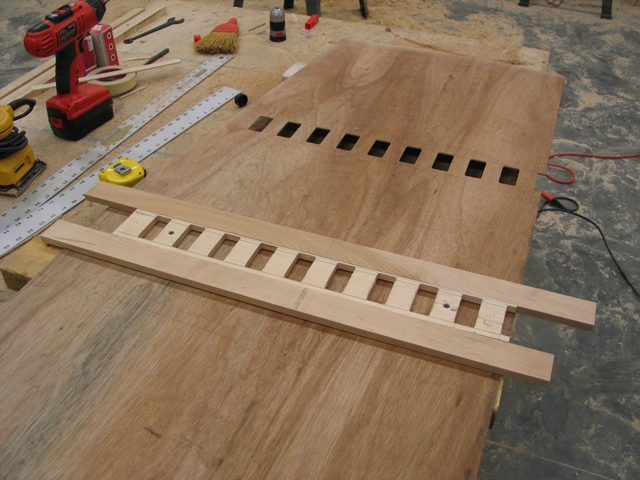 |
Under the slats will be a black material covered piece of luan plywood. Here we made a jig to cut rectangles for the brackets (that are attached to the slats) to pass through. |
 |
It was critical
that these holes are spaced exactly the same distance apart (in
order for the slats to be spaces evenly across the roof).
|
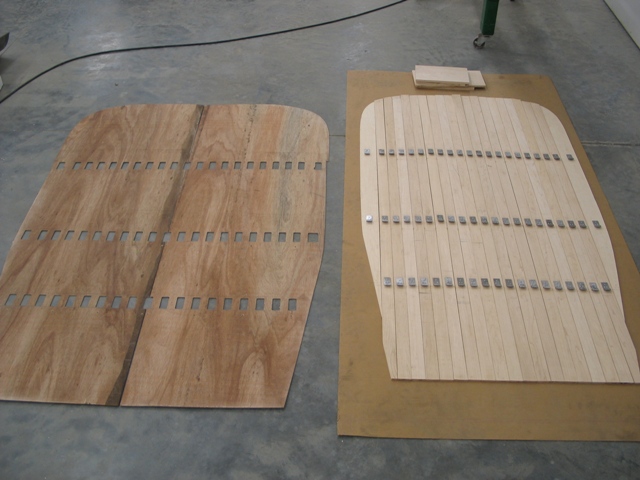 |
The luan on
the left goes up first (this will be covered with black material
for final assembly), then the roof slats.
|
 |
We finished the top side of the slats, painted the brackets and reattached them. |
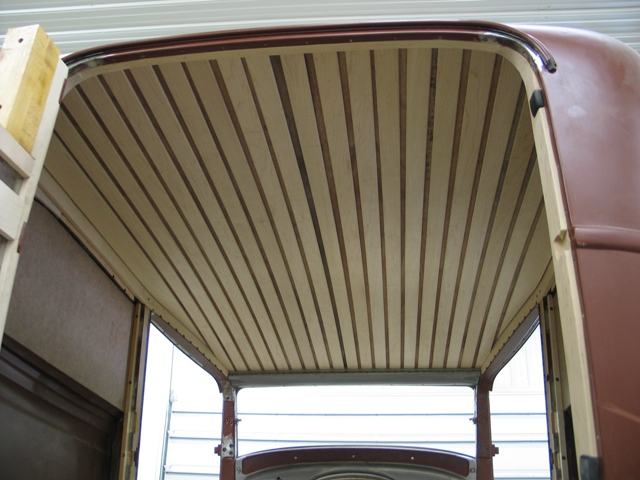 |
Here's the end product. Notice the front of the slats are evenly space (because of the locating pins added to the front header). When it goes in for the last time, there will be a piece that attaches at the rear that keeps them all spaced evenly at the rear (it nails on and look like a factory piece). |